4.2. “GID PALETTE” FILLING

A. Fill in the properties
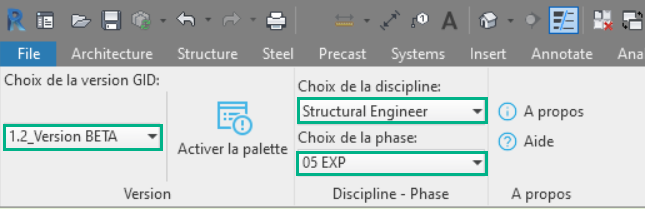
- Activing the palette in the corresponding tab

- Select:
- The version of the GID cards
- The discipline
- The project phase
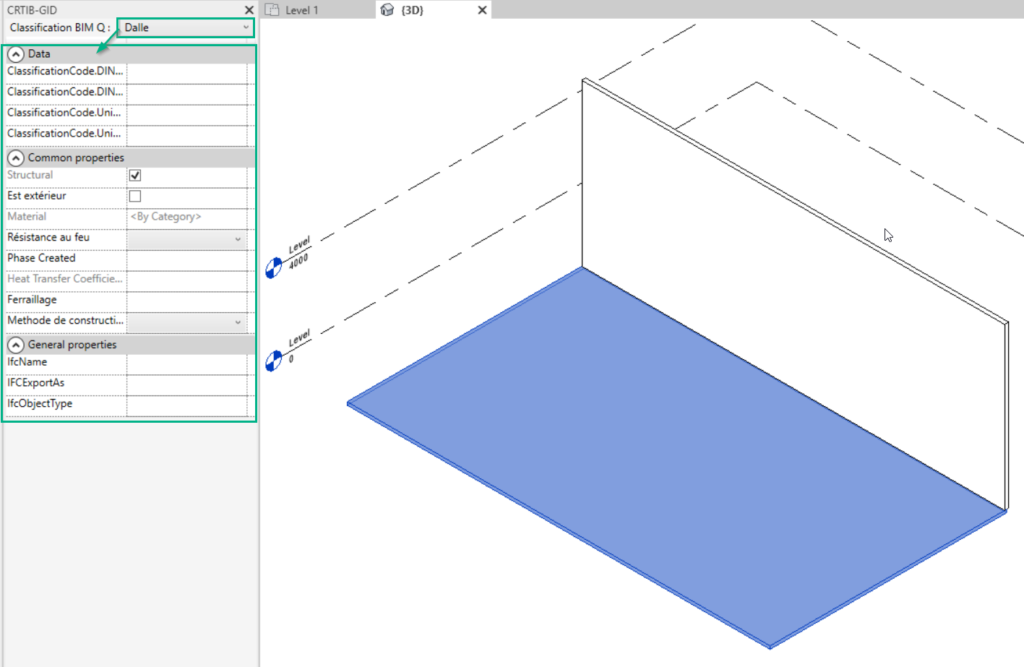
- Depending on your selection in the menu and the object selected in the view, the required properties will appear in the GID palette
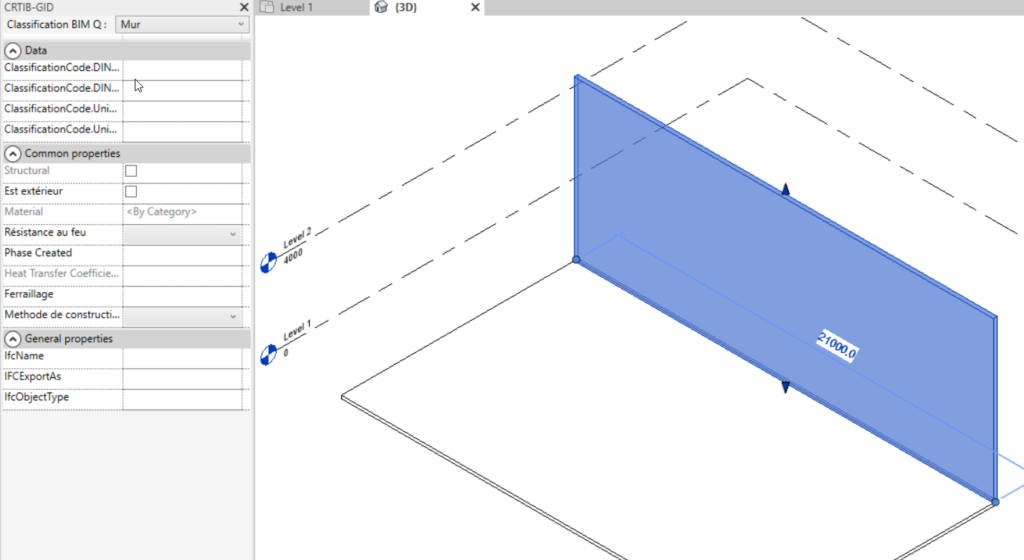
- For some Revit categories, it is necessary to specify a “sub-category” in order to display only the required properties in the palette

B. Precautions and clarifications to avoid errors
- You have to respect some Revit categories for your modeling otherwise you will get only a part of the properties in your IFC export, see detailed table here point 4.3
- You can proceed in the same way for all the objects of your project. The ideal is to create your types for each Revit family with integration of properties up to phase 5 of the project and the mapping will allow you to filter the properties to be exported or not phase by phase, this avoids re-encoding everything for each project. By proceeding in this way, when an object will have a type with the encoded properties (system or loadable family), we will be able to have this type for other projects via the Revit template by integrating a maximum of pre-encoded values and it will remain to complete the occurrence properties only (ID, …).
- For classification, do not use the Assembly code and Assembly description fields, you must check that these fields are empty (occurrence and type), otherwise the value of these cells will be taken into account during export.
- Some properties are not visible in the “Palette GID” window, especially some type properties. These fields must be filled in the normal Revit field, in the type edition.
- You can select several objects and modify their properties in a single operation
- You have to load the Classification Manager XLSX file before filling the IfcExportAs field because the field is created by loading this file
- It often happens that you have to deselect and reselect an object so that all the properties are displayed, don’t hesitate to do so if some properties are not displayed.
- For loadable families, it happens that the “IFCExortAs” property is already filled in, so you have to delete the value > apply with the APPLY button and then re-encode, in principle using the Classification Manager.